How to Tint Your RV Windows
How to Tint Your RV Windows
Is your RV feeling like it’s stuck in the desert, or being invaded by nosy onlookers? Take back control and enjoy a safe, cool ride with custom window tinting for your RV!
If you want extra privacy when out camping or if you’re looking for a way to reduce the heat and glare that comes in through your campervan’s windows, window tinting is definitely worth considering.
With proper installation, you can get a long-lasting result that will provide all the benefits you’re looking for. It only takes just a few hours to get campervan windows professionally personalized.
If you’re not sure, we’ve got all you need to know right here. So, check out this blog for an easy-to-follow guide on how you can transform that plain ol’ campervan into something amazing today.

What is Window Tinting?
Before we get going, let’s explain exactly what window tinting is.
Window tinting is the process of adding a thin layer of film to the outside of your campervan’s windows. This film helps reduce glare and heat, as well as add privacy. It also has UV protection benefits, which can help prevent fading and damage from the sun. Window tinting can range from very light to very dark depending on your personal preference.
The process of window tinting involves expertly applying a sheet of film over each window in your campervan. When done properly, it will look like the film was factory-installed to give you a professional result that looks great for years to come.
Tools You Need
If you want to tint your RV windows by yourself, gather the required tools first. You may need to purchase them before starting the process, or get a full tint kit instead. If you prefer to get your own separate pieces, make sure you have at least the following:
Knife
Squeegee
Lint-free cleaning fabric
Scraper blade
Amonia-free window cleaner
Soapy solution
How To Tint Your RV Windows
Step 1: Remove the window if you can
If you’re doing a window that opens on an hinge, it should easily pop off. Simply lift them up at 90 degrees, and it should just lift off its hinges. Just make sure your grip is secure – no broken glass disasters allowed here. Then place the window down on a flat surface so it’s ready to work on.
If it’s a static window, it will be a bit more awkward as you might not want to remove the rubber seal to remove the window. If not, don’t worry as you can do it with the window in place.
Step 2: Clean the window
Make sure your window is squeaky clean before you take the next step. There’s no room for dirt or scrap material in this process. Give it a few good rubdowns with an ammonia-free cleaner and a lint-free rag. A sparkling window ensures everything sticks perfectly when adhesive gets involved, so don’t forget this important prep work.
Step 3: Cut the tint film to size
Measure the window and cut the window tinting film so it’s a few inches bigger than the window. Say about 2 inches bigger on all sides, and this will give you plenty of space to play about with.
If you’re tinting your RV windows without removing the window, it’s best to cut it to size. You can either do this by making a stencil with a sheet of paper, or measure the window tint film up to the window and cut to size. I prefer to make a stencil as it makes for a neater job.
If you do have any extra to trim, simply run your knife along the edge using your firm straight edge scraper to guide you.
Step 4: Wet the window
Now spray the special solution that usually comes with kit on the inside of the window. If you don’t have this liquid, just mix a few drops of baby shampoo and water for an easy alternative, as long as the window is wet.
Spray it all over and don’t worry about spraying too much as you will squeegee it all out anyway. The soapy texture of the solution will allow you to manoeuvre the window tinting film until it’s in place.
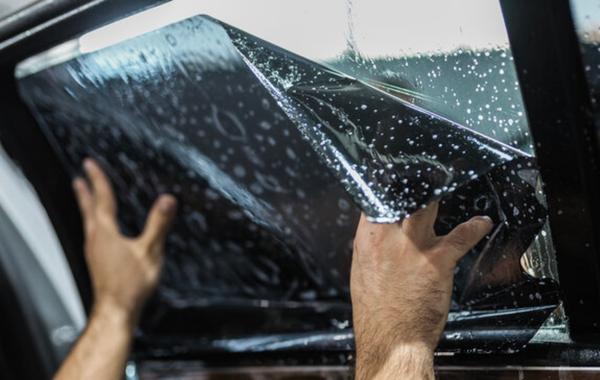
Step 5: Apply the window tinting
Now it’s time to lay the window tinting film on the wet window. You’ll need to remove the paper backing from the window tinting and then lay it down over the window. Don’t worry about bubbles as these will be squeegeed out in no time.
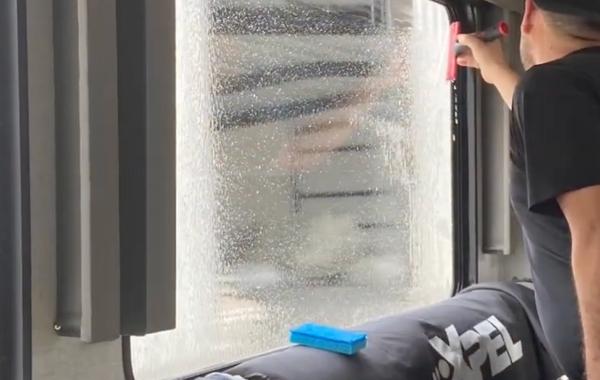
Step 6: Smooth out the window tinting film
Now get the squeegee that comes with your window tinting kit and smooth over every bubble on there. It’s best to squeegee from the middle and slide over to each edge to remove all the excess liquid and bubbles.
If you have a plastic scraper, this will also do, but just make sure you go over the whole window and remove all soapy water and bubbles. Some refuse to stay put so take some time and make sure each one is completely gone – it’ll add that final touch for quality perfection.
Step 7: Allow the window tinting film to dry
It should now look really smooth with no air bubbles. Well done, go and make yourself a coffee, or even crack a beer or two out of the chiller while you’re waiting for it to dry. Leave it for a couple of hours at least, and once it dries it will be stuck securely to your RV window.
Step 8: Put your RV window back
When it’s dry, and you’ve finished your beer (not too many of course), it’s time to put your window back if you removed it, of course.
Well done, you’ve just tinted your first RV window like a pro!
Things to Consider Before Tinting Your RV Windows
The Benefits of Tinting Your RV Windows
Of course, the benefits of tinting your RV windows should be the first thing to consider. These include enhanced privacy, another level of security, it will help keep you cooler in the summer and warmer in the winter, and it will also protect the interior from UVA damage.
Choose The Right Color/Tint
While you may have to follow some guidelines on colours and intensity, there are still ways you can get the tinting benefits you want for your RV windows. If you plan on doing it yourself, check local laws first. Otherwise, delegate the task to someone else who knows what they’re doing.
The most popular colours include grey, bronze, and green to a reflective mirror tint. If you are not interested in changing the RV’s original color or don’t want to ruin its appearance, you can go for a transparent film instead. It blocks 99% of UV rays and offers 50% heat reduction but still permits light to pass through.
How To Choose The Right Tint
The layers that make up the window tinting film admit different percentages of light. The Visible Light Transmission (VLT) factor is an indication of this amount. For example, a VLT 35 allows 35% of light to pass through it. In general, the lower you go on the VLT scale, the less light enters your vehicle.
What Type of Window Tinting Film To Get
The type of film you choose will depend on your needs and preferences. If your main goal is to reduce heat, then a high-performance window tint with low visible light transmission (VLT) and high infrared rejection (IRR) ceramic tinting. You may also want to opt for a carbon window tinting film if you’re looking for something that gives all you need for a relatively good price.
How To Tint Your RV Windows
So now you know how to tint your RV windows, and of course the benefits and which type to get. Doing it yourself isn’t as tricky as it seems and as long as you follow the step by step guide above, you will certainly add more value and privacy to your camper.
Hopefully you got something out of this guide, and your RV is now all tinted up. Please feel free to leave a comment with your experience so we can share with our community.

Hello, fellow wanderers! I’m Alyssia. Since 2008, my husband and I have called an RV our home, journeying through life one mile at a time. Our nomadic lifestyle has led us to over 70 countries, each with their unique tales that have shaped our own.
I share our stories and insights right here, hoping to inspire and guide you in your own adventures. Expect tips on RV living, our favorite camping spots, breathtaking hiking trails, and the joys and challenges of an ever-changing view from our window. Alongside, you’ll also find practical advice on outdoorsy stuff, designed to equip you for any journey. Join us as we continue to explore the vast, beautiful world on wheels!